
I’ll admit it…. I’m lazy.
Or maybe I’m efficient!
Truth be told, I don’t like standing around and waiting. It wears me out… 😉
I started making GAPS yogurt about 4 years ago when I started the full GAPS diet. At that time, there were only a few people sharing how to make yogurt online. They all took way too long for me.
I wanted to get ‘er done with very little standing around.
Over the next few weeks, I tested lots of different methods and all kinds of different yogurts. Here’s the method I like the most, and the yogurt my family likes the best.
I hope it saves you some time in the kitchen! 🙂
How to Make GAPS Yogurt in 30 Minutes
Before gathering your supplies, pour 1/2 gallon of milk into a 3-quart stainless steel, heavy-bottom pot and turn it on medium to medium high, depending on your stove.
You want the heat to be enough to heat the milk quickly, but not scald the bottom of your pot.
Now gather your supplies while your milk is warming up. You might want to stir it a few times while you are doing this.
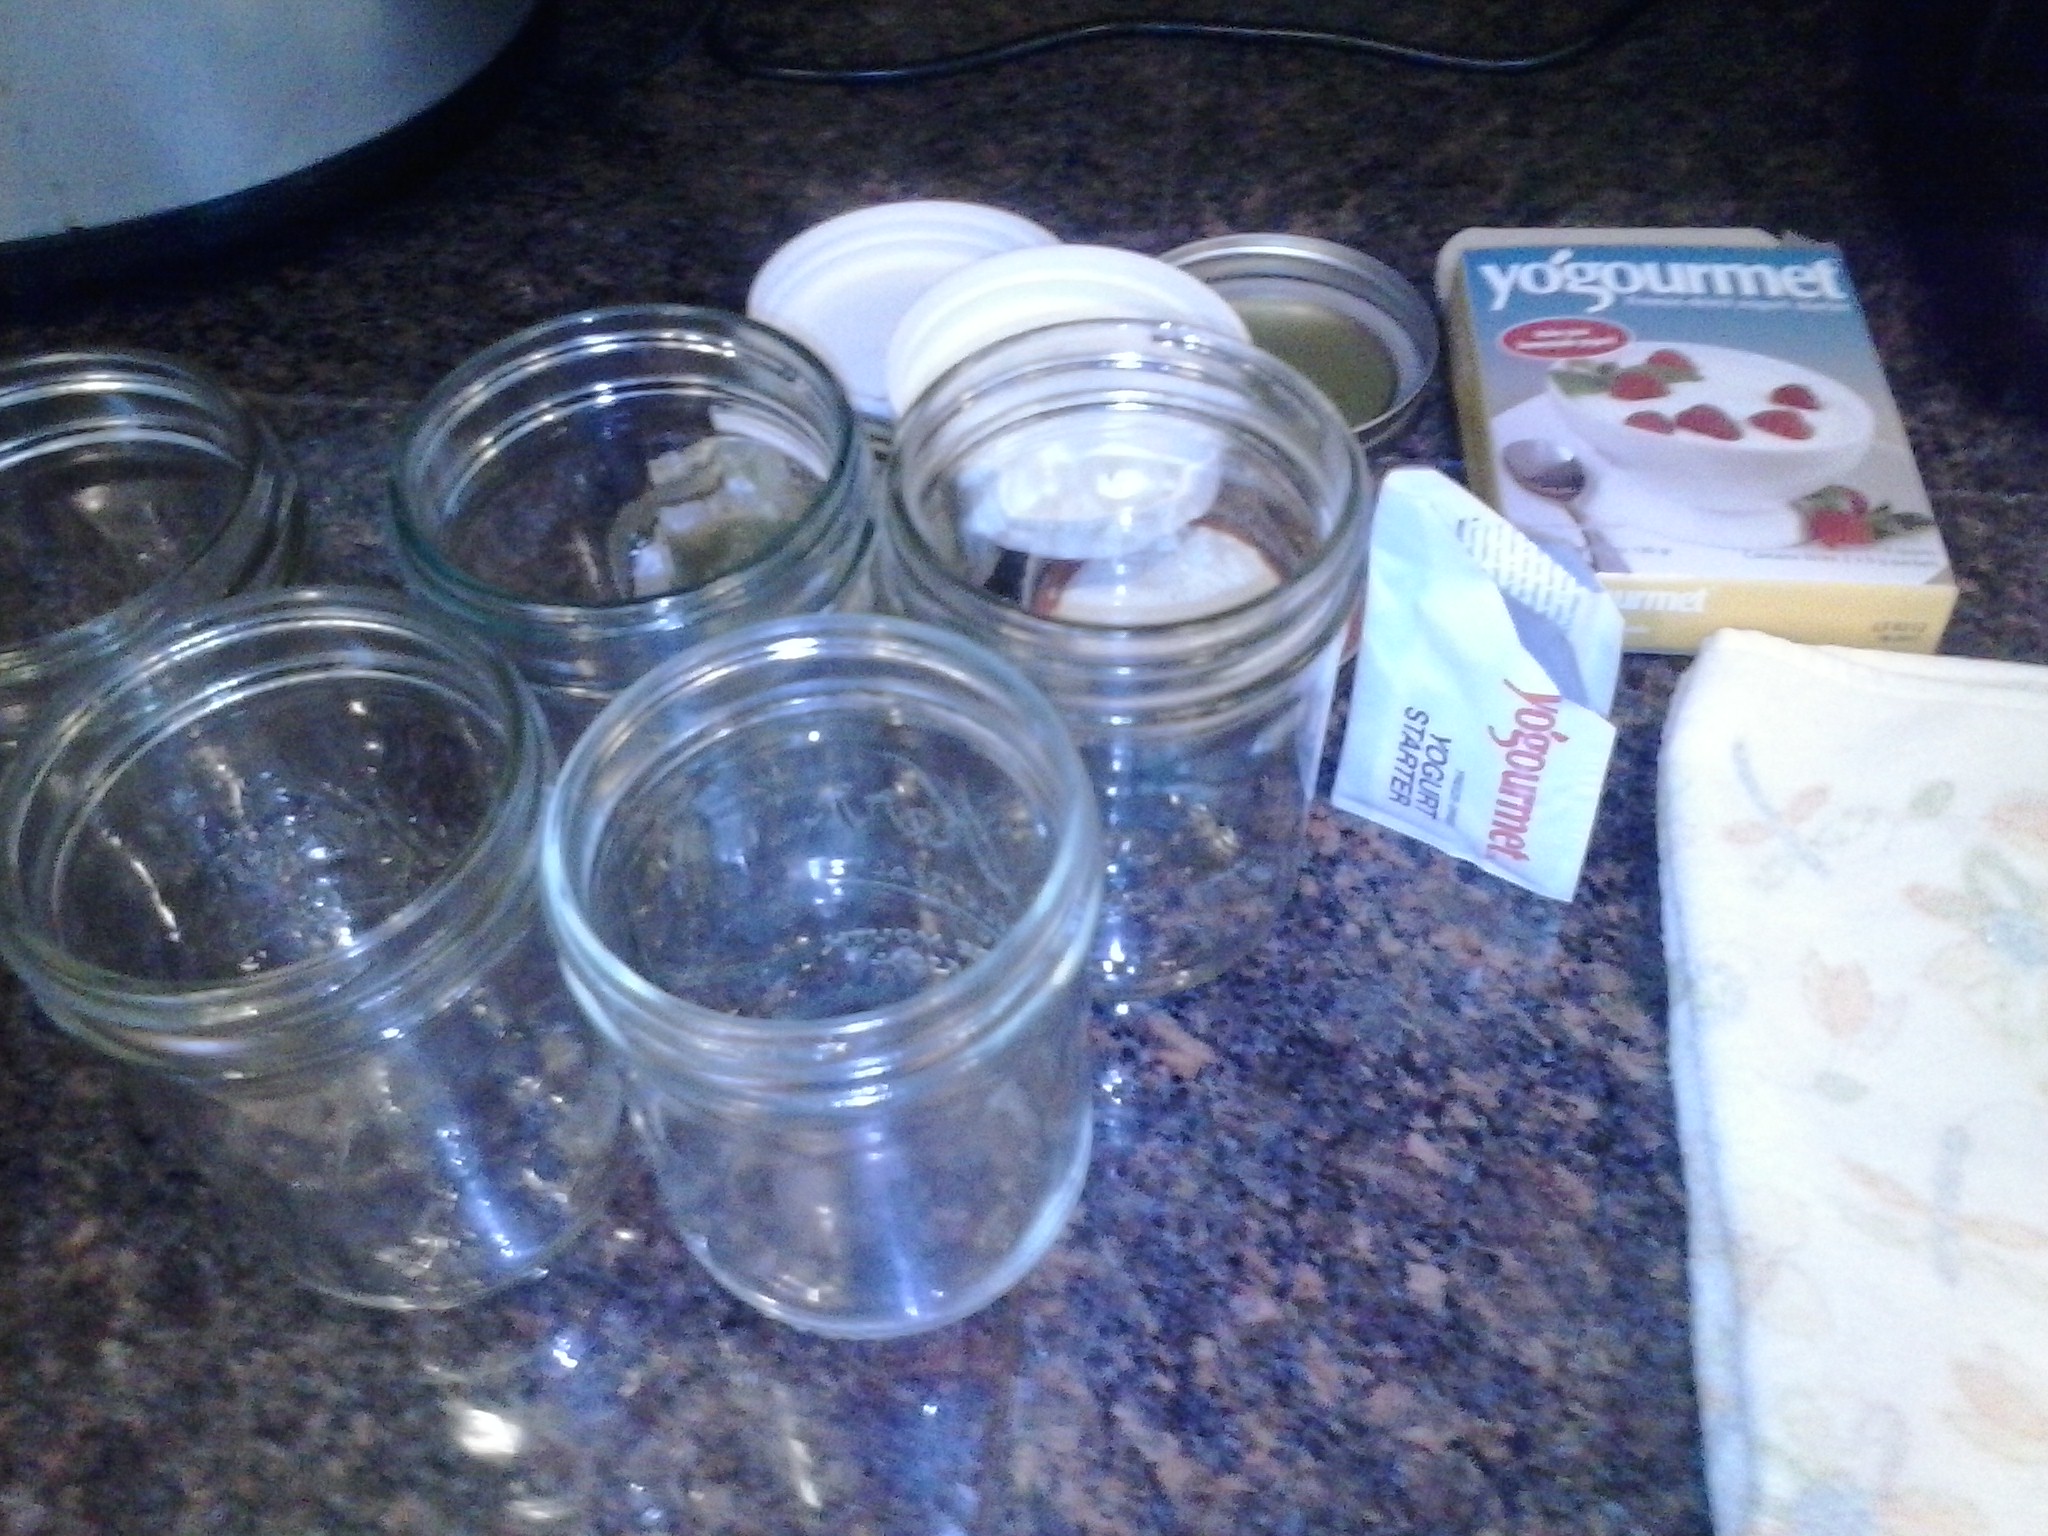 You will need:
- Yogurt starter. I use Yogourmet.
- Scissors
- Jars and lids. I use pint-sized Mason jars.
- Wood spoon
- Coated whisk
- Thermometer with a clip
- Your choice of glass container to mix the yogurt starter into a small amount of the warm milk. I use a Pyrex 2-cup measuring cup.
- A folded kitchen towel
- At least one clean, empty sink for the cold water bath
- Ice
The Yogourmet yogurt starter comes in packets and each packet makes 1 quart of yogurt, so we need two packets. Put two packets together or just fold them together and cut the top corner sideways.
As your milk heats up, you will want to stir it more often so it doesn’t scald the bottom of your pan. If this happens, start to stir it sooner next time.
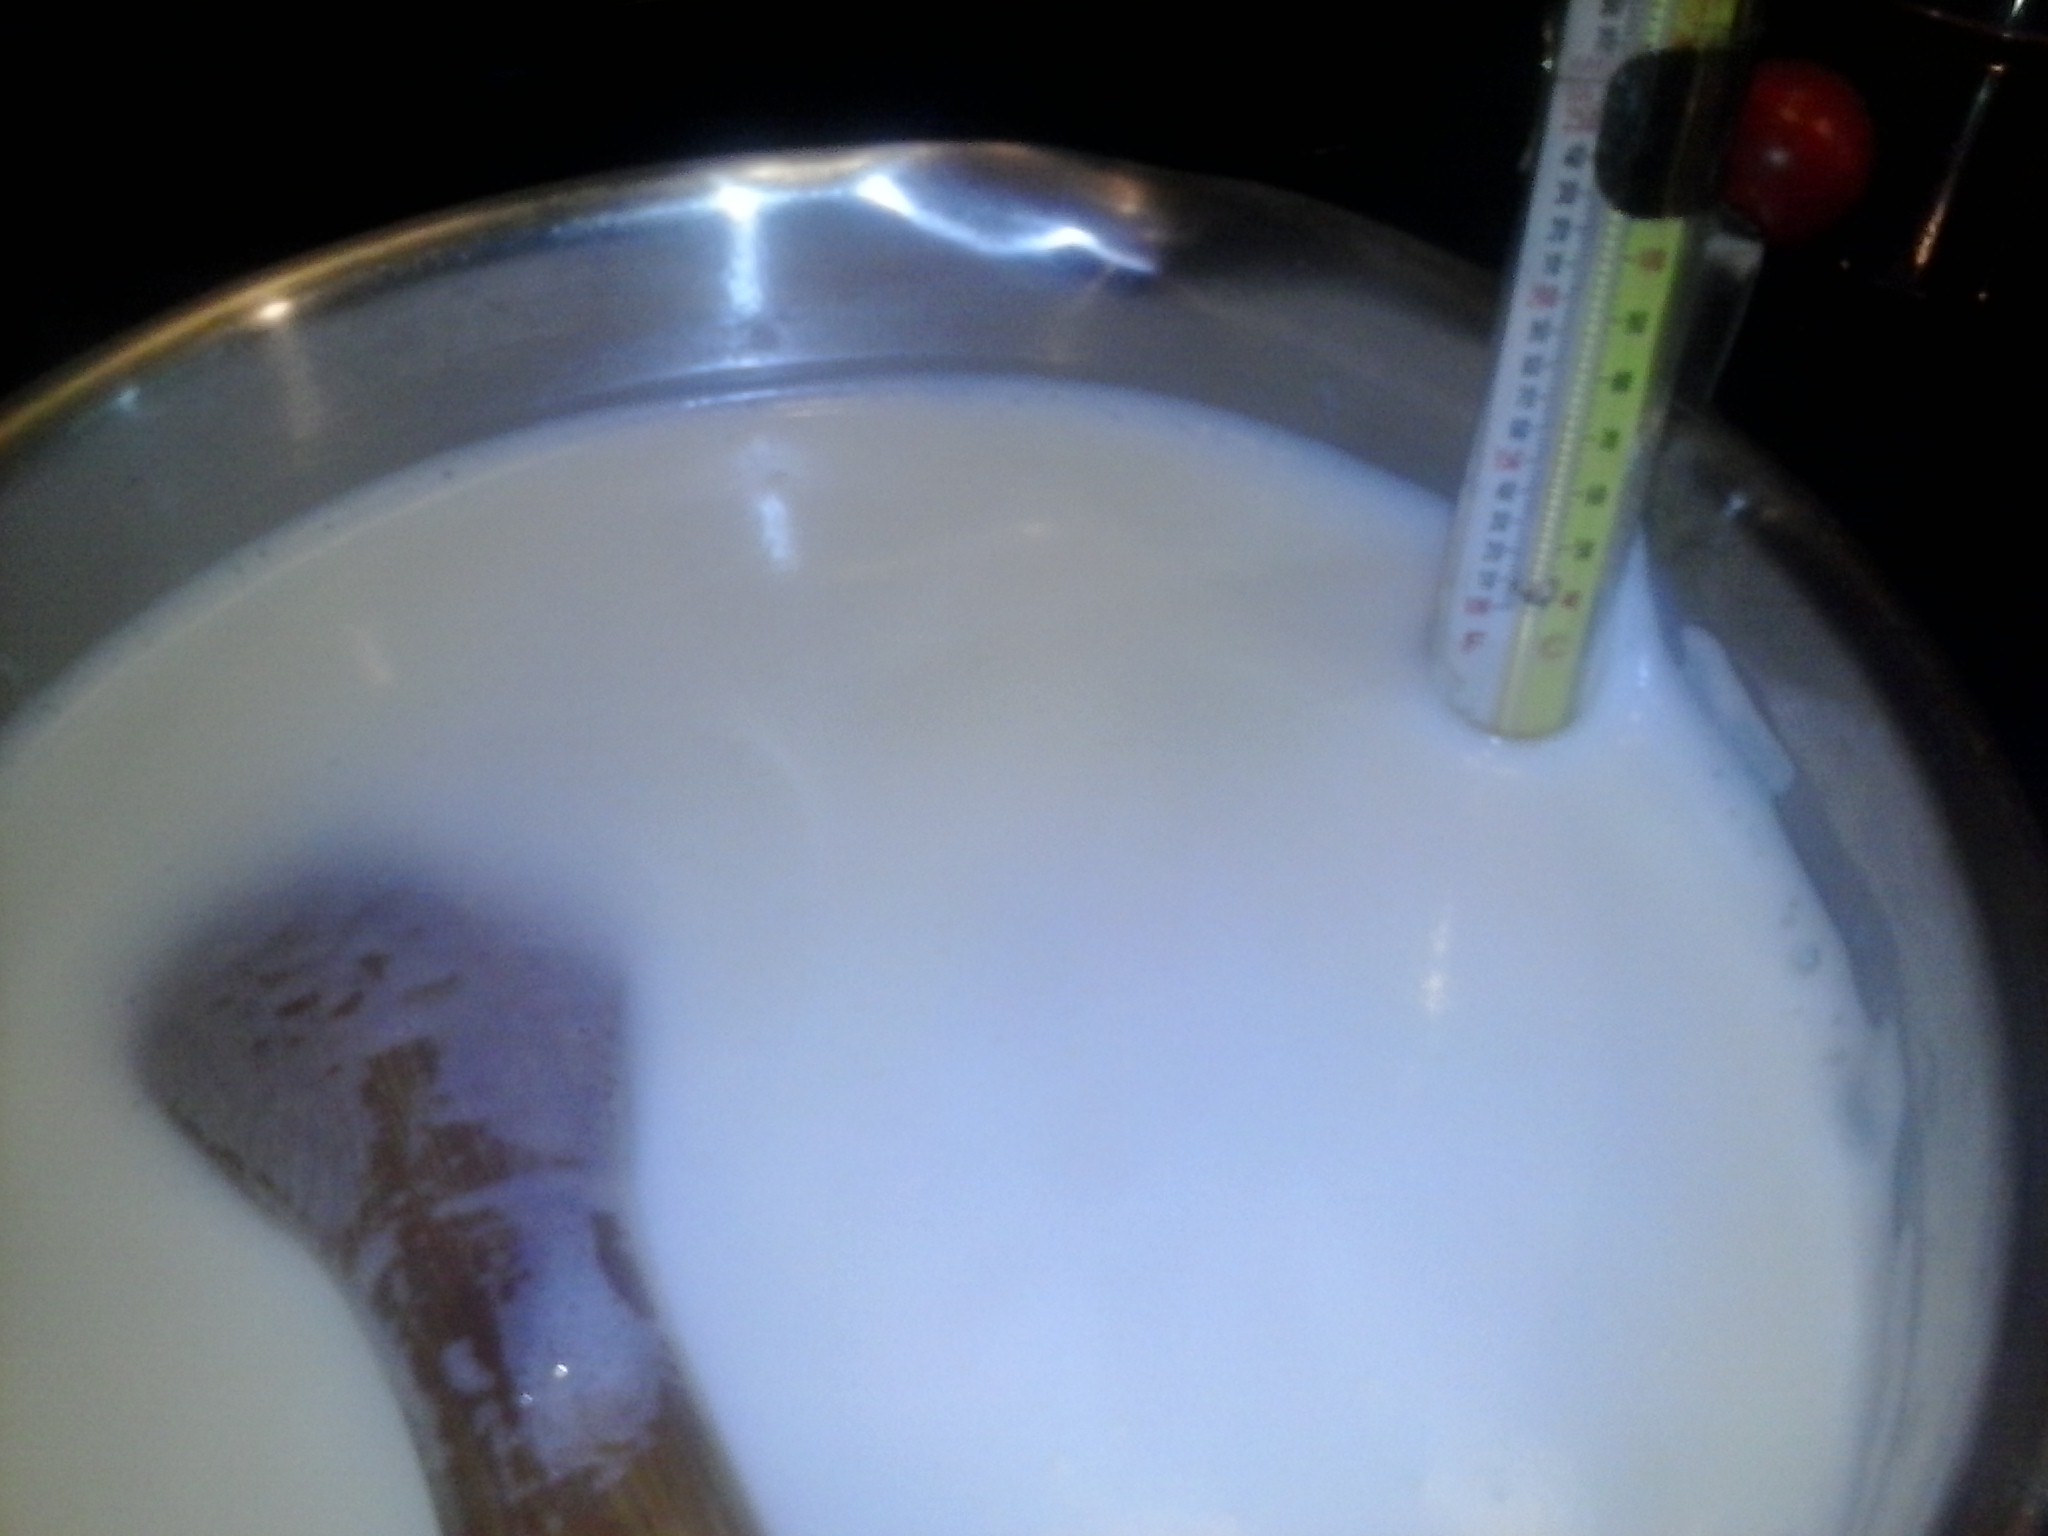
Add your thermometer to your milk and attach it to the side of the pan. Continue to stir the milk until the temperature is about 150 degrees.
Bubbles will form around the edge, and it might start to steam.
Prepare your sink for a cold water bath. Add ice to cold water until it is approximately 1/2 way up to the top of the pan. You will have to eyeball this.
Don’t forget to stir your milk while you are preparing this.
By now the milk should be up to temperature and should be steaming. You want it to be between 160 and 180 degrees.
Remove the pot from the stove. I do this at around 170 degrees.
Carefully place it into the cold water bath making sure no water gets into the milk. You might need to unplug the sink and drain it a bit or you might need to add water carefully to the side of the sink if it is too low.
Again, you need to eyeball it.
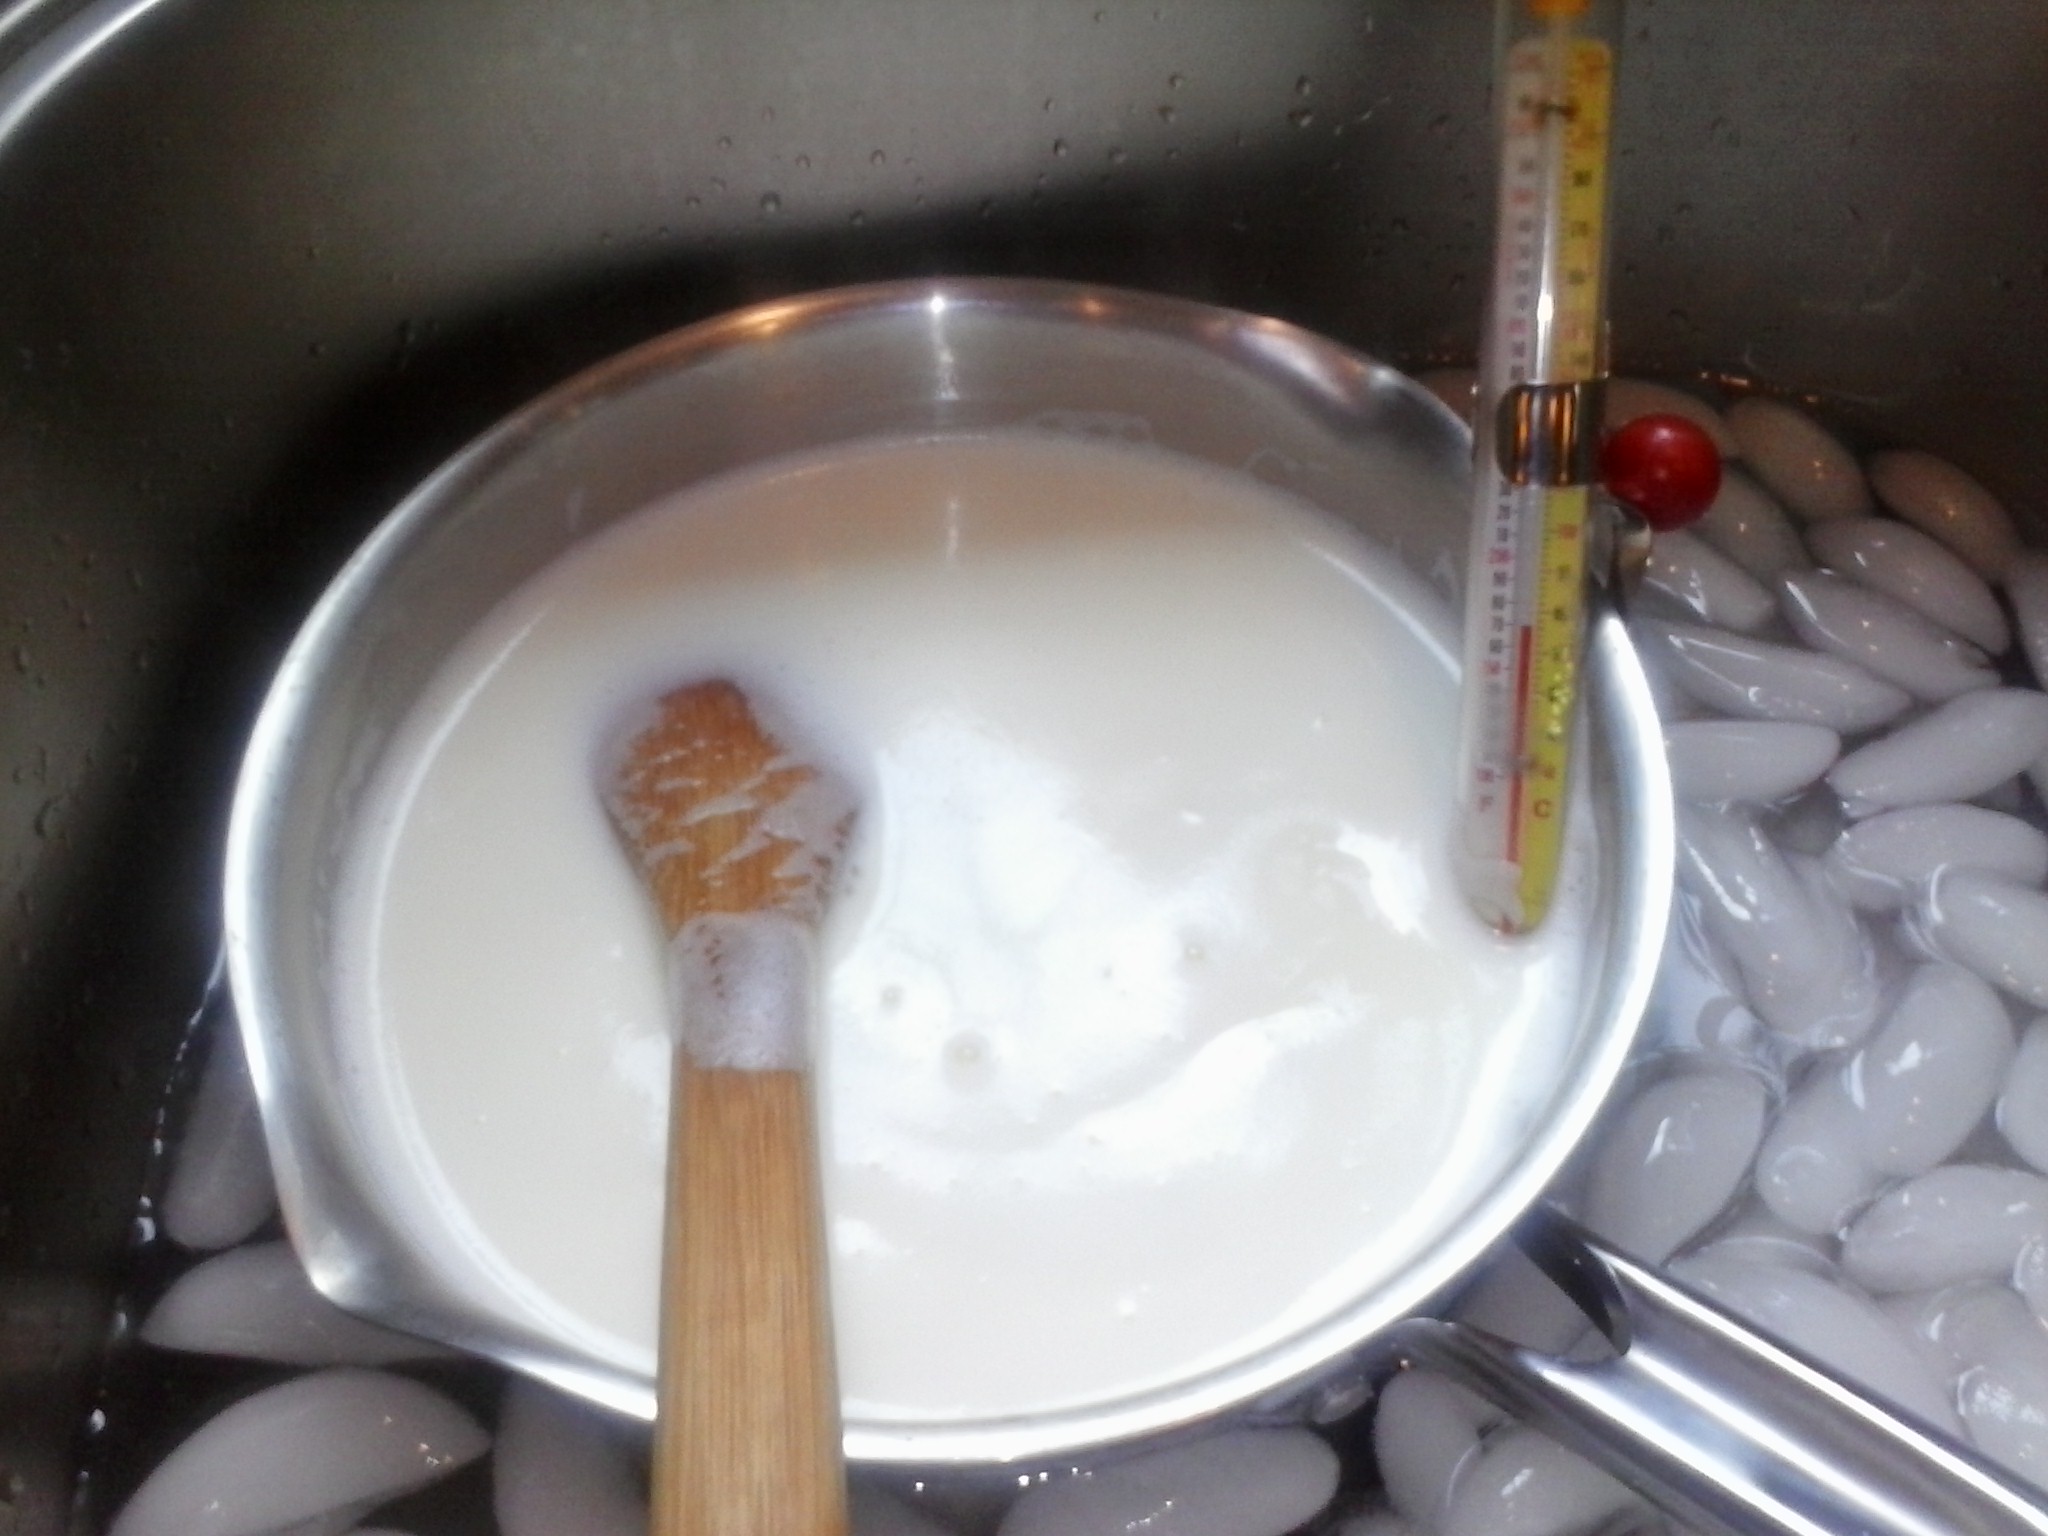
Stirring constantly at this point will make the milk cool faster. This step takes about 5 minutes. You can also stir the ice water around the outside of the pot.
Leave the thermometer in the milk, and let it cool to 110 degrees.
Now is where you need to move quickly so your milk does not cool off too much.
Remove the pot from the sink and pull the plug to drain your sink.
Place it on the folded kitchen towel. This step will save you from having to wipe the water off your counter and also keeps the pot from sliding around.
Pour a small amount of yogurt starter into the bottom of your glass container. You can have this prepared ahead of time.
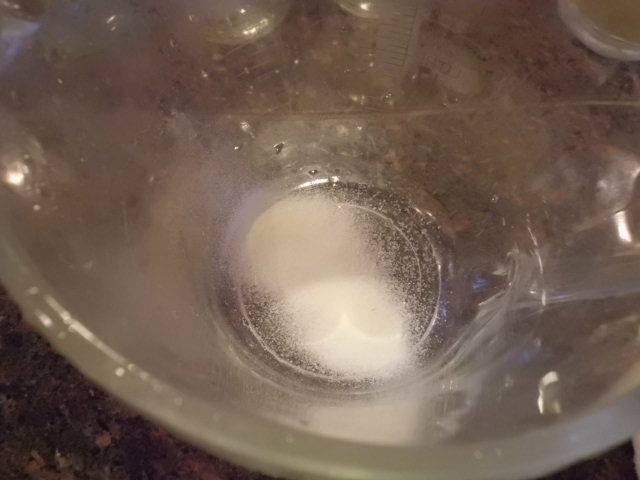
Pour approximately 1 1/2 cups of warm milk into the glass container.
Whisk briefly, then pour the rest of your yogurt starter into the container while you whisk.
Add the milk in your glass container to the milk in your pot.
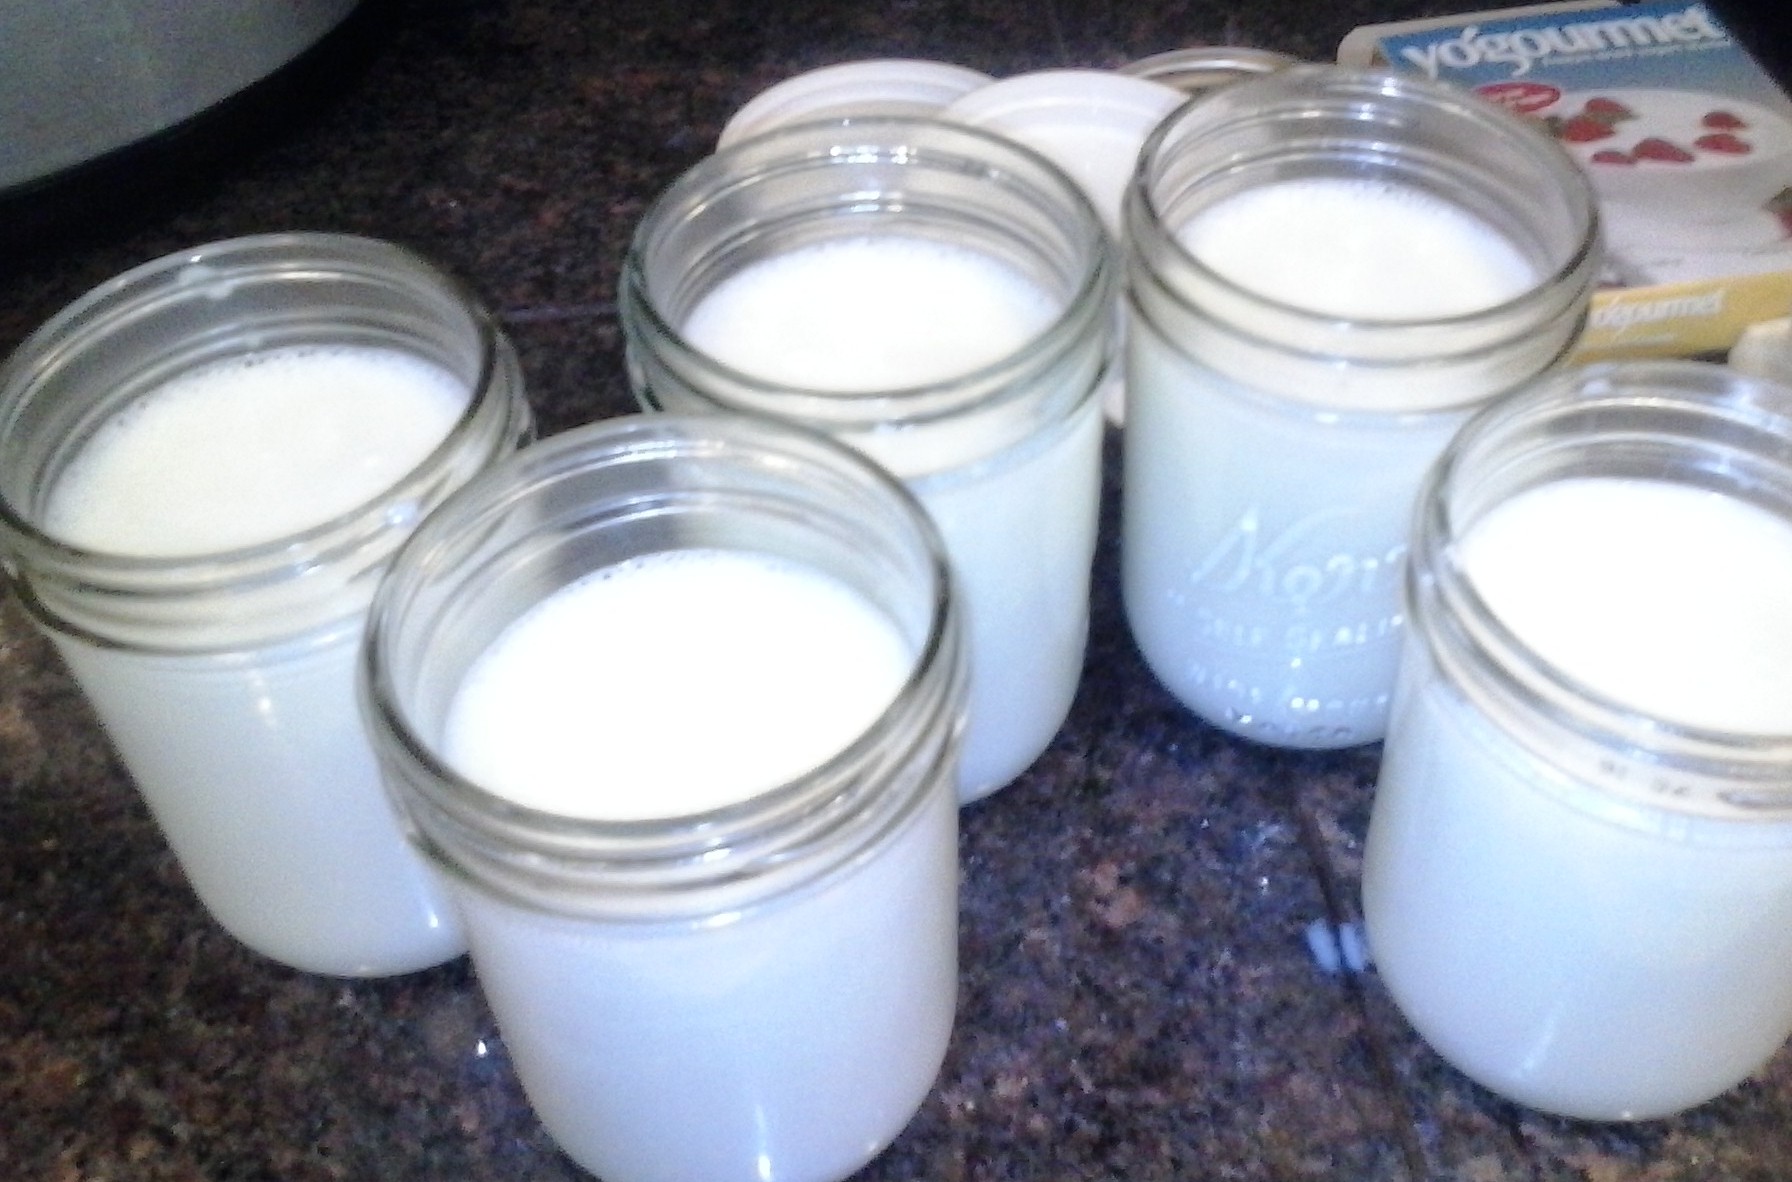
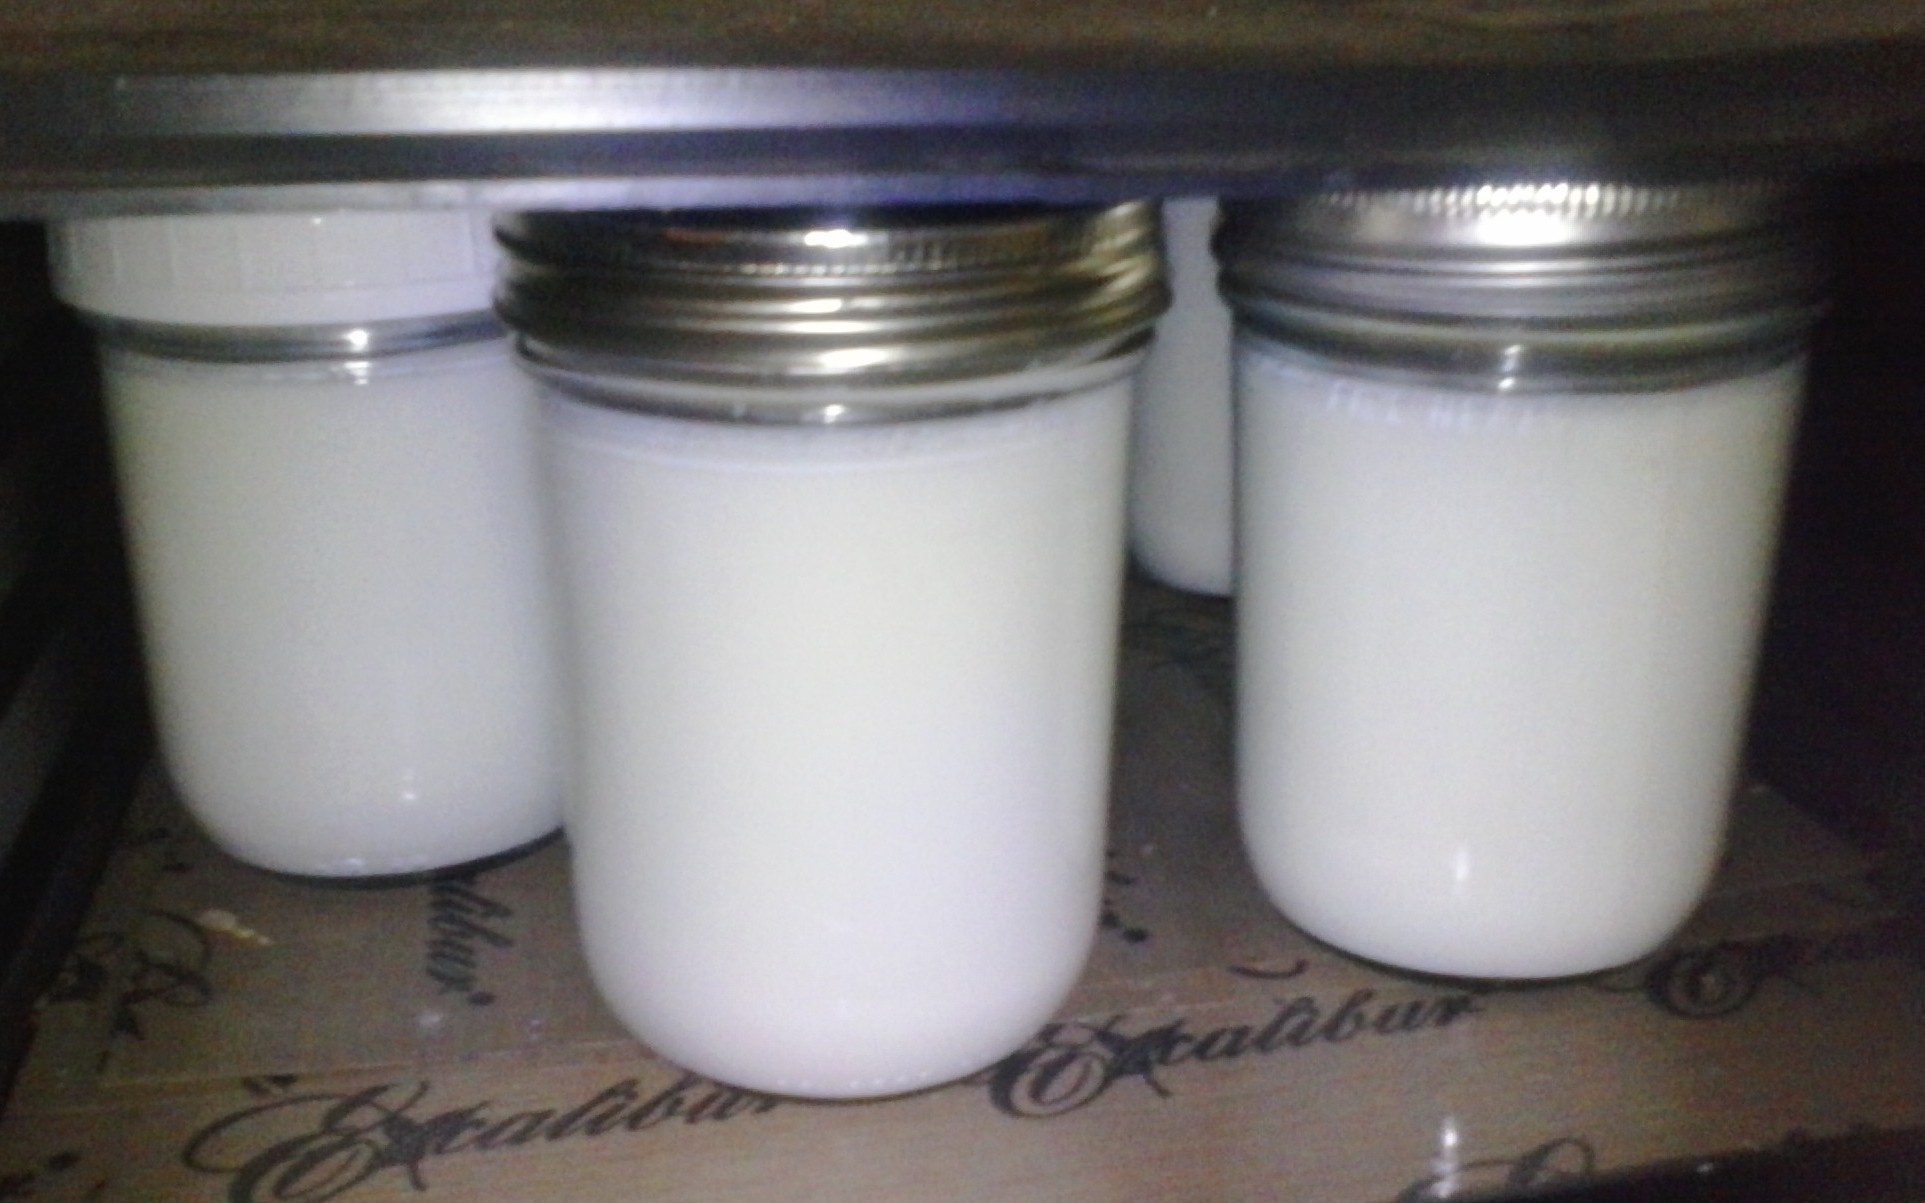
Whisk briefly and then pour immediately into your glass jars. (I use 5 pint jars.)
Tip: Don’t let the yogurt-inoculated milk stand in the metal pot for more than a few minutes. It might ruin your batch.
Place the lids on the jars. Place them into the Excalibur dehydrator (or your choice of heat source) and turn it on to 95-100 degrees.
Wait 24 hours.
Let it cool in your in your fridge for 5 – 6 hours.
Voila! GAPS yogurt!
GAPS Yogurt FAQs:
Why does GAPS yogurt need to incubate for 24 hours?
There are sugars in milk that are eaten up by the yogurt bacteria within 24 hours. Sugar is a no-no on GAPS. This will make a very tart yogurt, and many people sweeten it with honey, which is the only sweetener allowed.
Why do you use an Excalibur dehydrator to incubate your yogurt?
I’ll admit, it was an expensive yogurt maker, but it was the only option at the time. All of the yogurt makers on the market automatically shut off at 6 or 8 hours and did not give an option to incubate for 24 hours. The Excalibur gave me that option and also has a temperature dial so I can control the temperature.
There is at least one on the market now that gives you the control to incubate up to 24 hours. The price is comparable to the Excalibur, though.
I also use my Excalibur for lots of other things besides making yogurt. I got the smallest one available because of the expense, but wish I would have spent the money for a larger one.
Do I need to use a glass container?
It is my understanding that the yogurt culture will die when it comes in contact with metal. There is some controversy over this though. I had been taught that it is okay if the yogurt is in contact with metal for a short amount of time.
This is why I use a coated whisk.
Does the yogurt starter need to dissolve completely to work properly?
It is not necessary. Just as long as it is whisked through the milk a few times.
What kind of milk should I use?
You need to use the best milk you have available and can afford. Grass-fed, raw, organic is your best choice.
I scalded the bottom of my pan. How can I clean it up quickly?
Baking soda and water works great!
Is the Yogourmet yogurt starter GAPS legal?
Yes. The illegal GAPS ingredients in Yogourmet are just trace amounts and therefore okay.
I’m not on the GAPS diet. Do I have to incubate my yogurt for 24 hours?
No. You need to incubate it for 6-8 hours and can use any means necessary for incubation since you don’t need to regulate the temperature.
After I went off GAPS, I started using my oven to incubate my yogurt and it works great! When you start to gather your materials, turn on your oven to it’s lowest temperature and turn it off when it gets up to temperature.
Then turn on the oven light. After you fill your jars and add the lids, place the yogurt on a cookie pan and place it in your warm oven. If it feels too hot, leave the door open for a bit.
The light bulb is enough heat to incubate your yogurt. I like to make yogurt in the evening and leave it in the oven overnight. In the morning I put it in my fridge.
So easy!
Do you make yogurt? What’s your favorite method? I’d love to hear from you!
Shared on: Fat Tuesday and featured on Sunday Snippets.
Some of my links are affiliate links and help to pay for this blog.